No Bad Memories
Studio → Blog
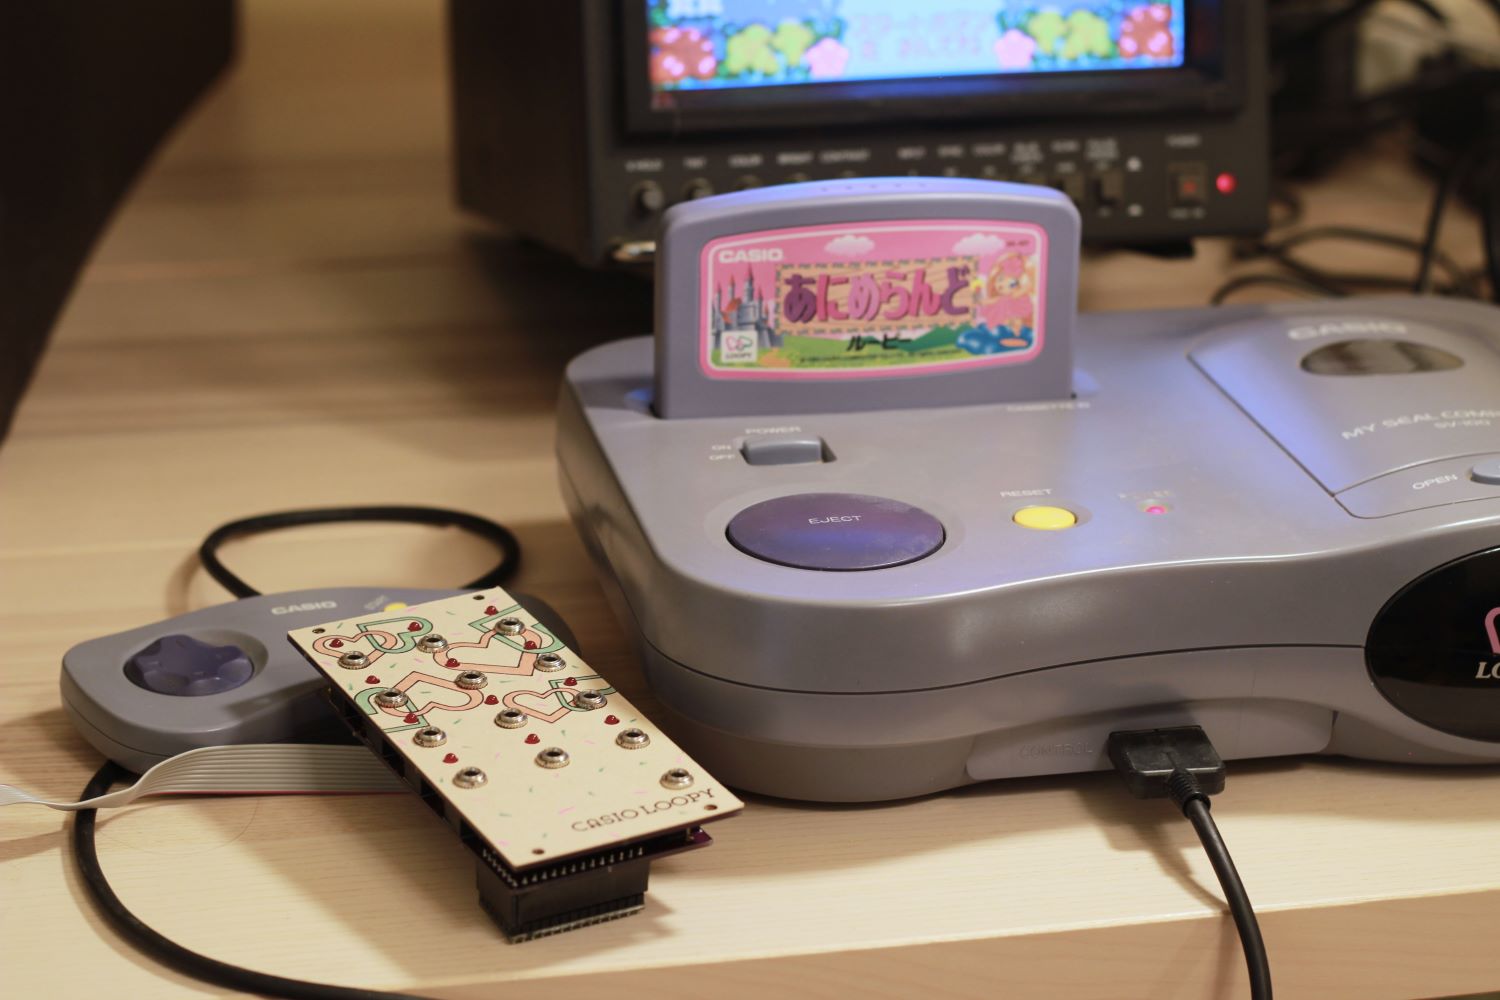
A Casio Loopy Eurorack module
Posted Thursday, May 26, 2023
What do you get when your video game collecting habit collides with your audio electronics habit? Why, custom Eurorack module firmware based on the sounds of the Casio Loopy video game console, of course! When reflashed, this module employs a drum kit made of sounds nestled within the Loopy console's BIOS. And it sounds beautiful!
Read on to learn how I wrote custom firmware for this and other video-game inspired samplers. (And if you have a BAD IDEA #1800-CALL-YER-MUM module at home, you can grab this firmware on GitHub for your own use.)
Why?
My pandemic hobby was building my first modular synth. It's a diminutive (by Eurorack standards) 92HP/3U rack. I designed the synth to aid my work in preserving the history of girls' electronic toys and video games, so I chose modules that would help me bring musicality and rhythmic variety to all manner of relevant external audio sources: anything from Hello Kitty video games to circuit-bent Barbie laptops.
The sampler: #1800-CALL-YER-MUM
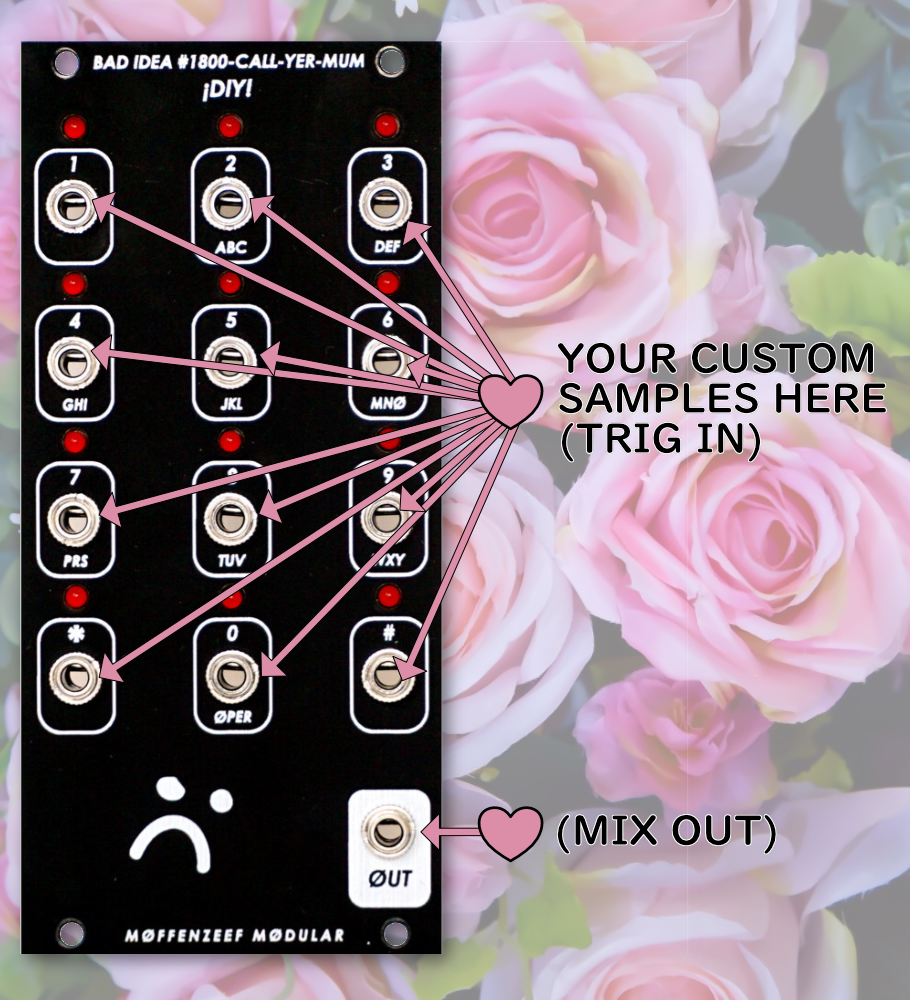
I've been making a conscious effort to talk about music-making in ways that don't center gear or what to buy. However, I'm breaking that rule to speak to a particular module in my setup: an audio sampler. It's a critical part of my synth, as it allows me to reuse and rearrange slivers of sounds I've captured from games and toys. The sampler I use is the BAD IDEA #1800-CALL-YER-MUM by Moffenzeef Modular.
The #1800 has been out of production for some time, so I consider myself lucky to have found one when I started building out my synth. The module is powered by a Teensy microcontroller with firmware containing 12 audio samples. The module's interface is wonderfully clever: the panel offers 12 input jacks for patching in triggers, one for each of the 12 sounds. Instead of having a corresponding set of 12 outputs, the module outputs a single, mixed-down audio signal.
The #1800 ships with firmware that mimics touchtone dialing, which feels right at home with the telephone-style layout of the panel. But the module can be reflashed with one of many alternate firmwares Moffenzeef provides on their GitHub repo. These alternate firmwares are based on a variety of classic and modern drum machines, which some might find more useful than touchtone sounds.
On its own, a reflashable 12-piece drum kit in a 10 HP package is a terribly useful module. However, given my interest in using the sounds of girls' games and toys, I was keen to get my own samples loaded on the module.
Building a Casio Loopy drum kit
I knew the first firmware I wanted to create was for a drum kit based on the Casio Loopy. This Japan-only, 32-bit video game console was marketed to girls and featured a built-in color sticker printer that allowed players to make customized stickers to trade with friends. Coincidentally, another pandemic hobby of mine had been exploring Casio Loopy emulation with engineer pal Phil Bennett. In 2021, he successfully dumped the device's BIOS and retrieved the audio samples used by game cartridges to create music and sound effects. I used his work to separate out the components of the drum kit, which could then be used in a sampler.
Voiding my warranty
Moffenzeef provides no mechanism for users to load in their own samples to the #1800. Nevertheless, I decided that creating some warranty-voiding custom firmware was in order.
The instructions for reflashing the #1800 describe how to use the Teensy Loader Application to load the provided firmware (compiled .hex files). The #1800 repo also includes source files for each of these firmwares. Each folder of source files contains contains one .ino file as well as a .cpp and .h file corresponding to each sample. So, I figured I could make my own firmware by:
- Determining how to convert my 12 audio samples from
.wavto the matching.cpp/.hformat, - Editing an
.inofile to use these custom samples, and - Compiling the
.inoto a.hexfile so that the firmware can be easily reflashed by drag-and-drop with the Teensy Loader Application.
Fortunately, the provided .cpp source code gave me an idea of how to achieve the first step. The comments note that the audio sample was converted with something called wav2sketch using 44100 Hz u-law encoding. I was able to track down the wav2sketch tool tucked away in Paul Stoffregen's Teensy Audio library. The C or Javascript version can be used for the conversion, though I prefer the Javascript port. (I did have to comment out the line that reads out += 'PROGMEM\n'; because such syntax is not supported in my older version of the Arduino IDE.) Converting my Casio Loopy .wav files with wav2sketch spit out .cpp and .h files in just the format I was expecting.
From there, the remaining steps were pretty easy: get the proper libraries installed, replicate an .ino that points to my custom samples, and have the Arduino IDE output a .hex binary. My Loopy drum kit worked on the first try. Hooray!
Gyroid sounds and other drum kits
Once I had this process nailed down, it was hard for me to stop dreaming up new firmware! One features nothing but vocal samples from girly cartoons like Moondreamers and Jem and the Holograms. Another is a drum kit made entirely of Gyroid sounds from Animal Crossing: New Horizons.
To capture the Gyroid sounds, I placed all the percussive Gyroids in an otherwise quiet room of my in-game house and turned each one on, one at a time, while recording my gameplay footage.
I even pulled sounds from my own NES homebrew catalog to make BADIDEA-PARTYTIME-NES, a #1800 firmware made of 8-bit sounds sampled from the noise and DPCM channels of TRACK+FEEL II (2012), Electronic Sweet-N-Fun Fortune Teller (2013), and Computers Are Easy, Love Is Kind (2015).
Custom overlays
For fun, I also created a few custom panel overlays for the Loopy, Gyroid, and NES firmwares.
At first, I considered making proper replacement panels for each firmware. However, changing out the panel on the #1800 is a bit of work given the 13 panel-mount jacks. So, I took a page from the Vectrex playbook and created thin overlays that could be easily swapped in and out. Each overlay is held in by the four corner screws, so disassembling the panel can be skipped entirely.
Moffenzeef provides vector files for the #1800's panel, which I was able to modify for use with my Cricut plotter and cutting machine to accurately draw on and cut cardstock. Then, I handpainted the cardstock with India ink. While not at all necessary, the overlays are a fun way to convey which firmware is loaded on the #1800.
Do it yourself
The Loopy, Gyroid, and NES firmware binaries for the #1800 are available on GitHub. However, I realize that they're very reliant on a particular piece of hardware. In the future, I'd like to provide these kits in other, more flexible formats as well. In the meantime, I hope you're inspired to consider how to preserve endangered sounds through reverse engineering and tool making.