No Bad Memories
Studio → Blog
Mimeoprinting (Printmaking as play, part 2)
Posted Wednesday, May 18, 2022
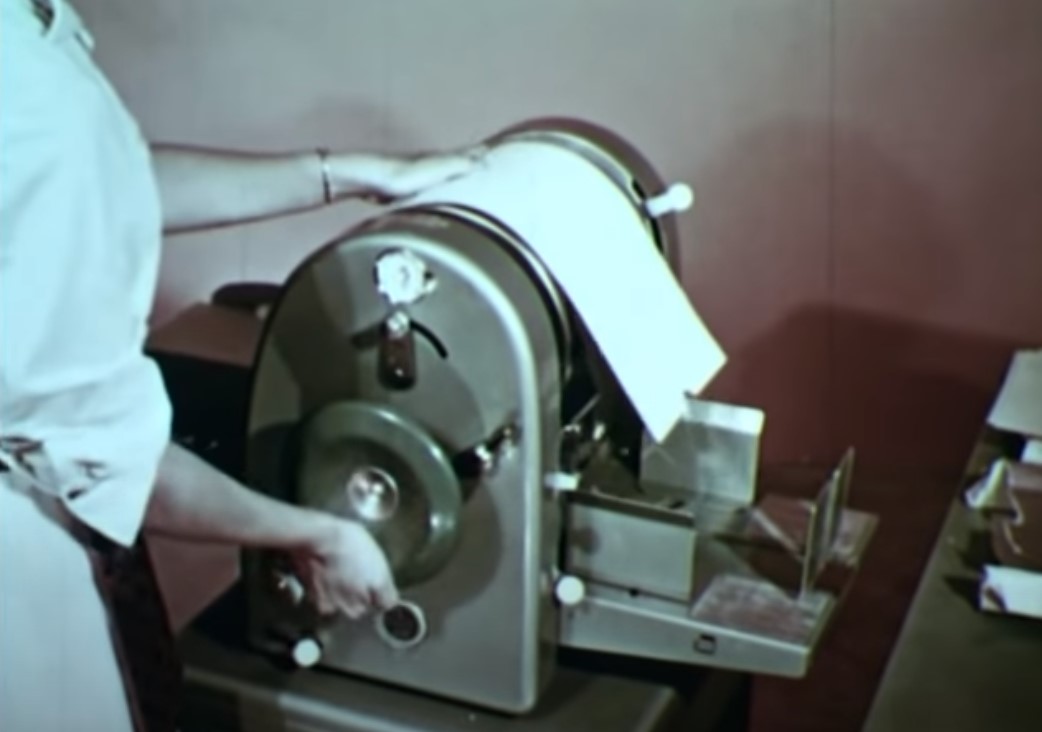
In my last blog post, I shared my adventures in reverse-engineering the Print Gocco, a DIY printmaking device from the 1970s. While Print Goccos have been out of production for nearly 20 years, I found that I could use an inexpensive shipping-label printer, themoplastic stencil paper, and a few simple craft materials to create a DIY version of the device. Here are my learnings and recommendations on how you can try out this printmaking method for yourself.

The goal
I admire the craft that goes into printmaking techniques like screenprinting and intaglio, but sometimes, I just want to make a few prints for fun, and I'm perfectly happy to make trade-offs in quality or scale. In making something Print Gocco-like at home, my goal was a setup that:
- meets or exceeds the print quality of the Print Gocco
- is easy and suitable for a beginner
- is small enough to use seated at a desk and to store easily when not in use
- can be done quickly, including preparation and cleanup
- has limited dependencies on specialty materials and can instead make good use of reclaimed or everyday items
- minimizes waste and the use of harmful materials
Prior art
Before we dive into the how-to, a quick note on prior art: I do want to stress that my joy in "discovering" these techniques is not meant to lay claim on any novel invention. Indeed, after five or six weeks of iterating on my design, my jaw dropped when I came across the YouTube channel of Stampalofi demonstrating nearly the same technique using a repurposed fax machine in place of a label printer. I have since found similar work by Mimeograph Revival, Tomoko Kanzaki, and Rich Dana, too.
I might have found their work earlier had I thought to include the keyword "mimeograph" in my internet research. Oops. I vaguely knew about the hand-cranked mimeographs and Ditto machines used by teachers to make worksheet copies many decades ago, but I hadn't considered how they worked. It turns out that mimeographs, like Risographs, use a thin stencil paper inked by an ink drum. In the case of a mimeograph, master images were imprinted through pressure from a stylus or typewriter hammer.
So I did unwittingly reinvent a wheel, it seems, but it was fun to do so. After seeing that I wasn't alone in these adventures, I came away inspired to add my voice to the small but mighty choir of stencil-printing enthusiasts. And the newfound connection to mimeography inspired a name for my previously nameless method: mimeoprinting.
How to mimeoprint
The basic steps I follow are:
- Prepare a monochrome image
- Cut thermoplastic stencil paper to size
- Use a thermal printer to print the reverse of the image on to the shiny side of stencil
- Place the stencil, shiny side down, on a sheet of paper
- Apply ink through stencil to the paper beneath
- Cleanly remove the stencil
- Repeat as needed
There are, of course, many ways to accomplish these steps, but I'll share specifics of the methods I used (as well as a few I abandoned). Please note that the following activities will void warranties; proceed with caution and adult supervision, etc.
Preparing stencil paper and printer
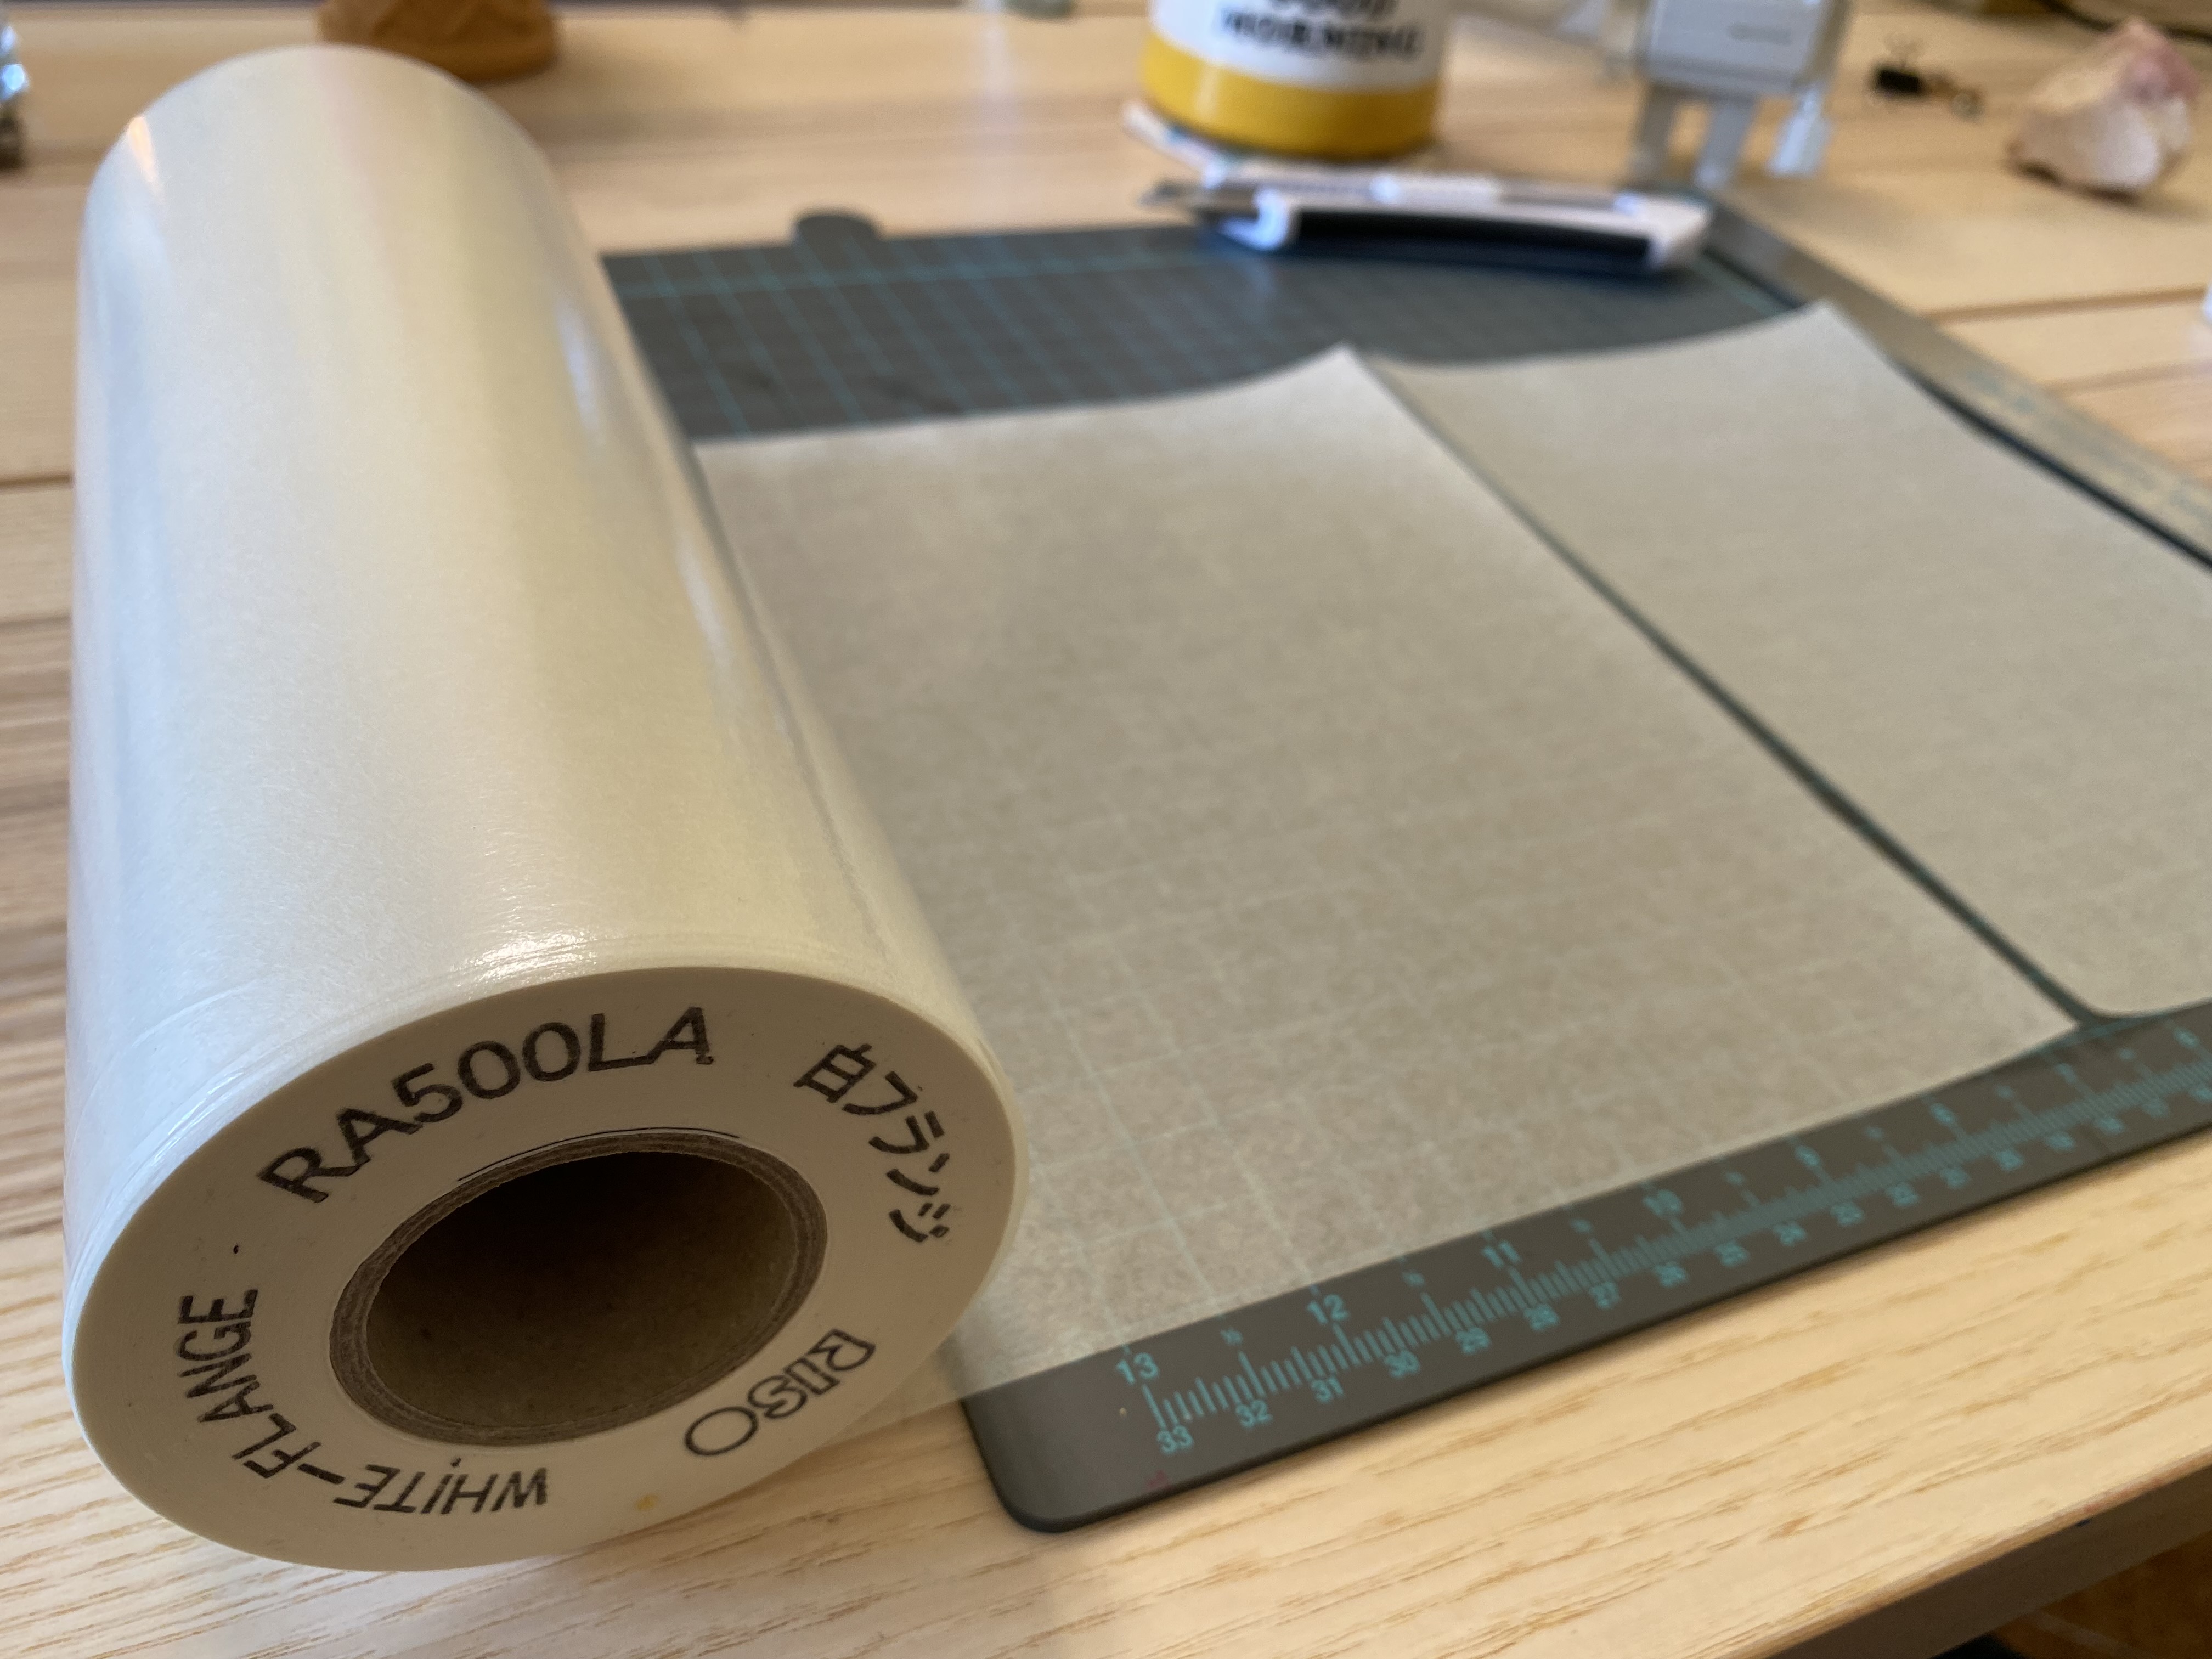
Risograph and Risograph-compatible stencil is sold by the roll. There are some differences in roll size and resolution for different machine models. I haven't done any exhaustive testing; the roll I use is labeled for use in RA500LA machines.
Risograph stencil can be cut to size easily with scissors or a blade cutter. Be careful that the thermoplastic layer doesn't separate from the tissue backing while cutting.
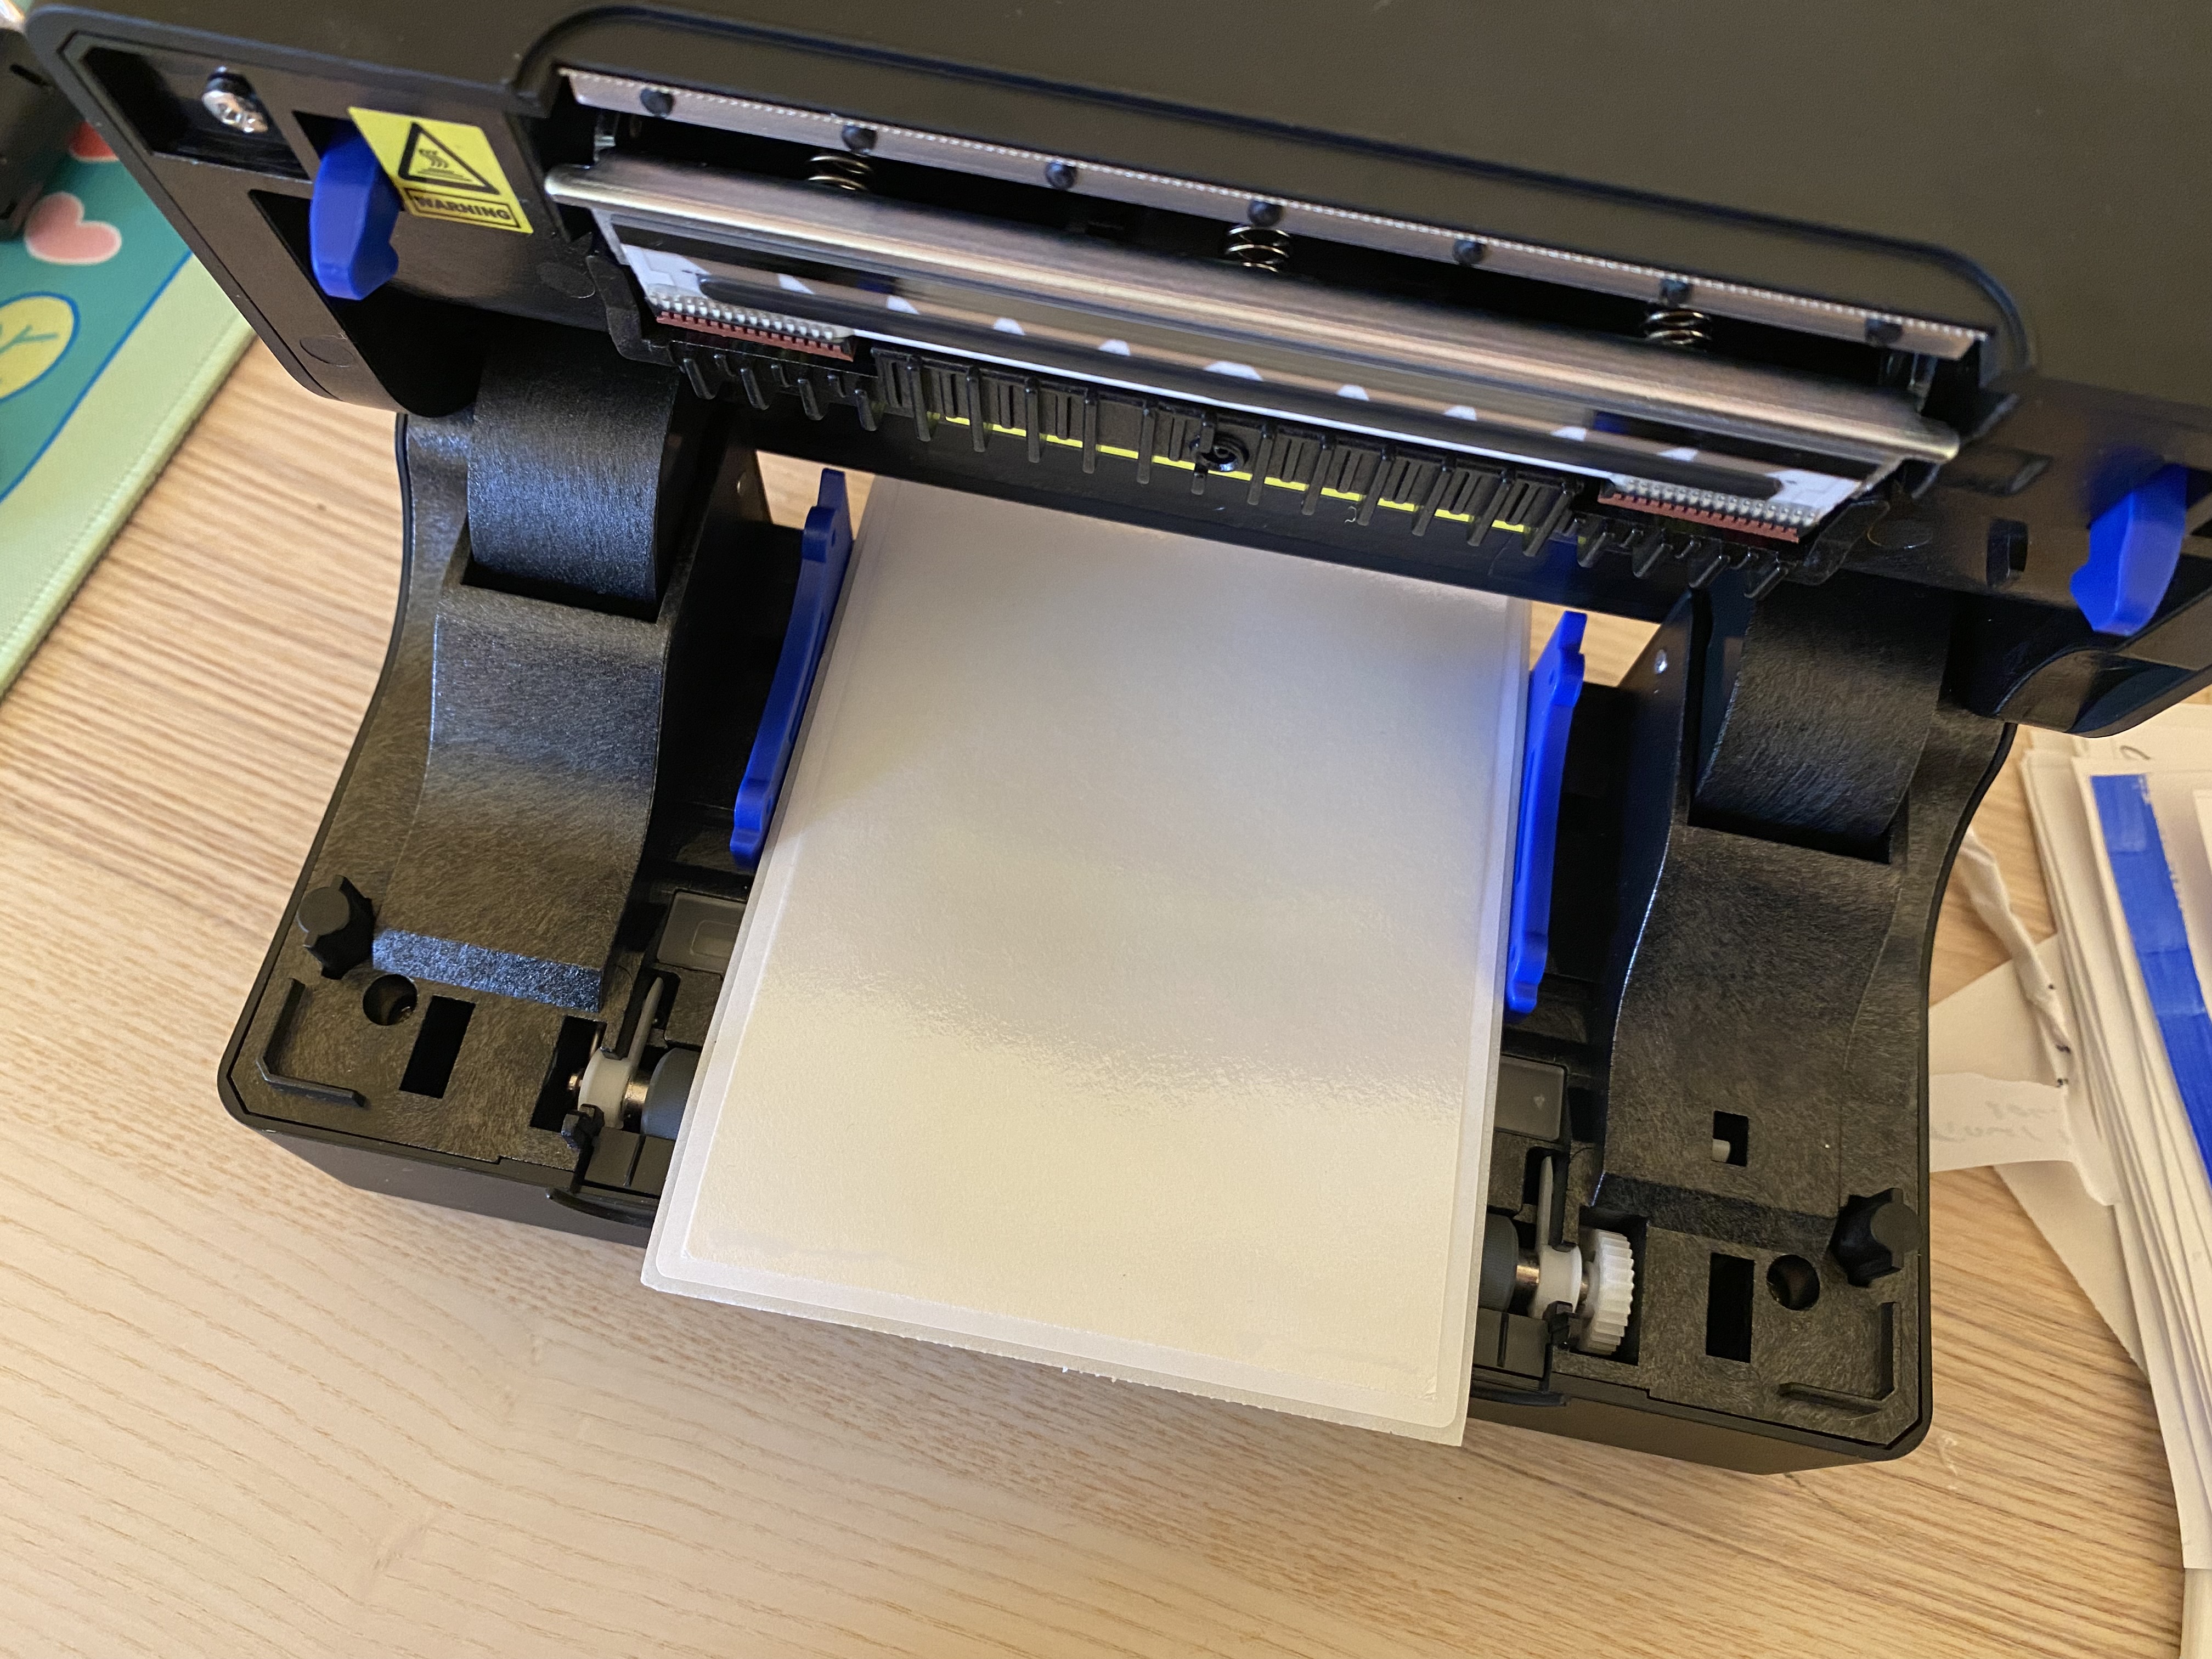
The label printer I use to burn my images is a Logia 300 DPI printer for 4" x 6" labels. I chose this model for its price, small size, print resolution, reusability as a label printer, and its lack of dependence on an accompanying mobile app for printing. (Third-party apps are prone to rapid obsolescence.) I recommend buying used or repurposing old tech—as Stampalofi has done with the fax machine—instead of buying something new where possible. Another benefit of using a fax machine is its larger print area.
Before loading the label printer, I lightly adhere the cut stencil to a blank label using the absolute smallest amount of adhesive along the leading edge of the stencil. This makes the stencil thick enough to feed through the machine correctly. Additionally, my label printer uses a small camera to align labels as they're fed into the machine, so it needs to "see" the top-most edge of the sticker in order to print.
It's important to keep the stencil flat and free of frayed areas or exposed adhesive. Any glue that seeps out can risk getting into the printer internals, which will damage both your print and the machine. I use Fineline Red-Top Glue, which is a regular white glue that comes with a syringe-like applicator. In my experience, tape and rubber cement do not work well and can get caught in the printer.
Since the stencil can be easily torn, it's important to clean the printer head and rollers before and after each print. I keep the printer's settings at the maximum darkness level and with a reduced speed which is, to be fair, still around one second per print. Examine the stencil after printing to make sure there aren't tears. Blank labels can be reused if care is taken when removing the stencils after printing.
All thermal printers will have their own quirks and caveats, so consider these general guidelines.
Keeping the stencil taut
The stamping motion of the Print Gocco works in part because the stencil paper is rigid and is tightly adhered to its cardboard frame. Without this rigidity, ink will pool and prints will smudge. (This explains why color-dense areas are more challenging for the Print Gocco: they represent areas in which the stencil is weaker.)
If you plan to repurpose the Print Gocco, you may find it challenging to adhere your custom stencil to a frame tightly enough. After experimenting with a number of approaches, including making my own Print Gocco frames from cardboard, freezer bags, and laser-cut acrylic, I concluded that using the Print Gocco was more trouble than it was worth.
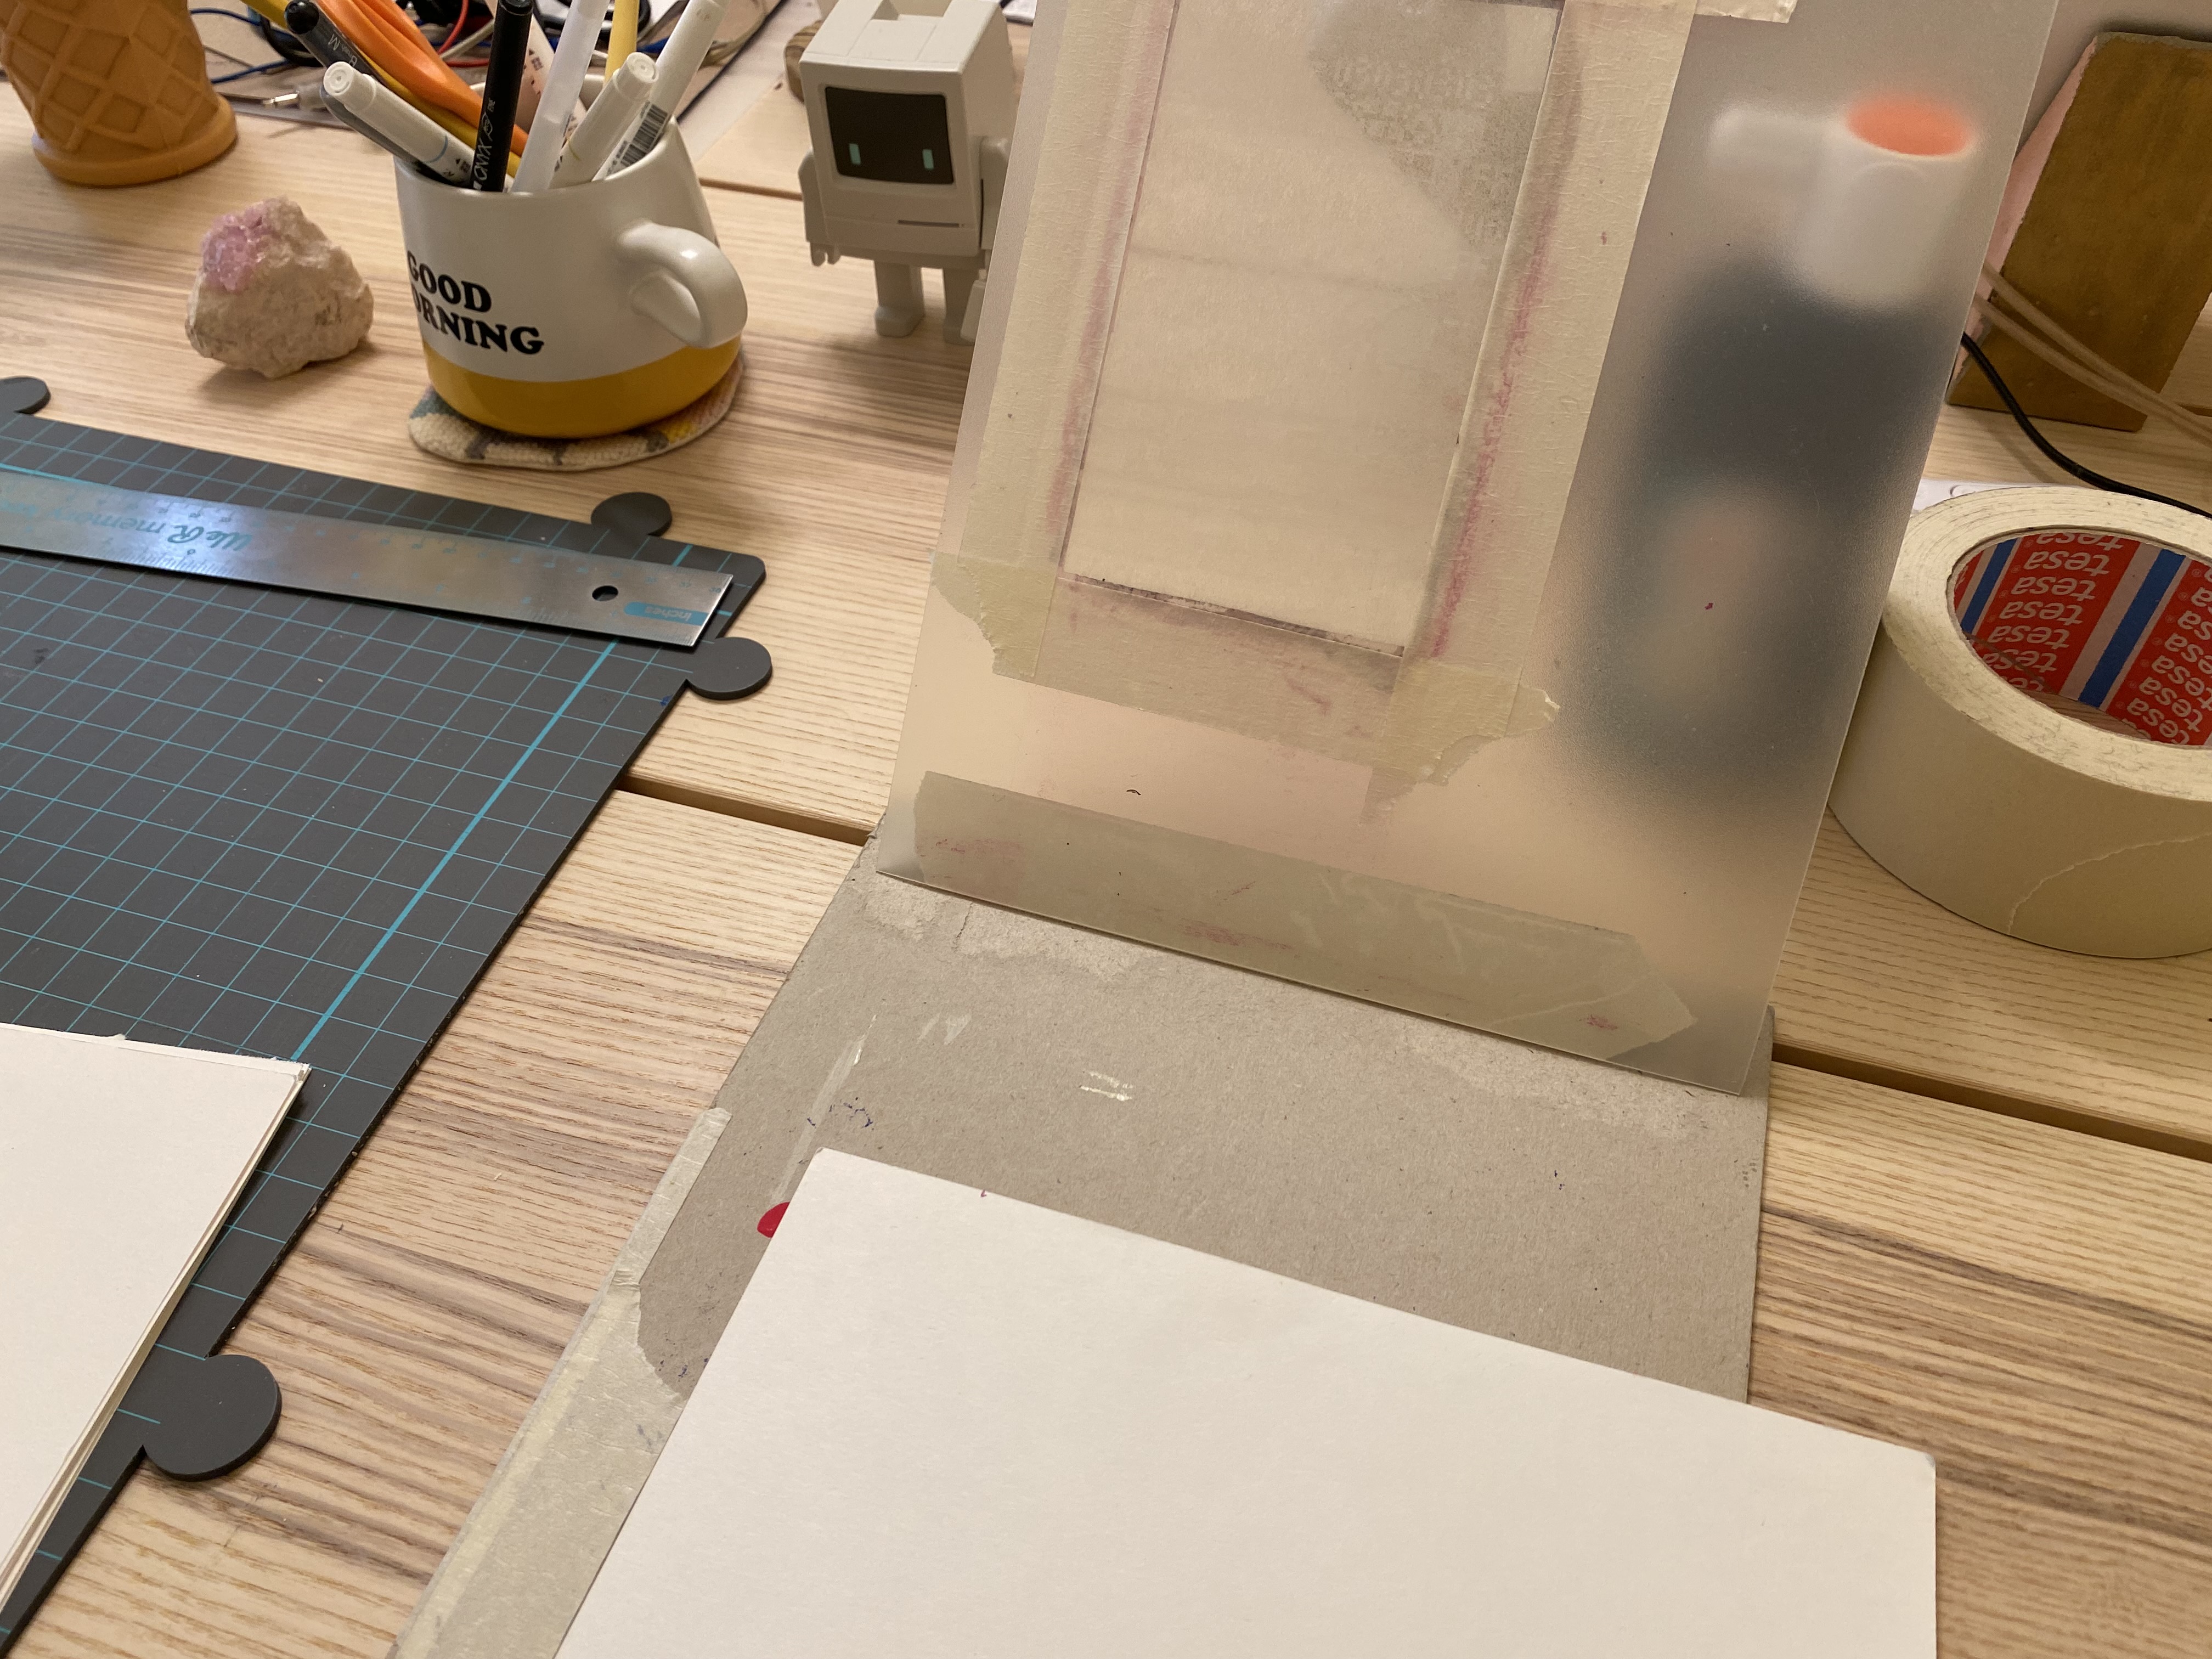
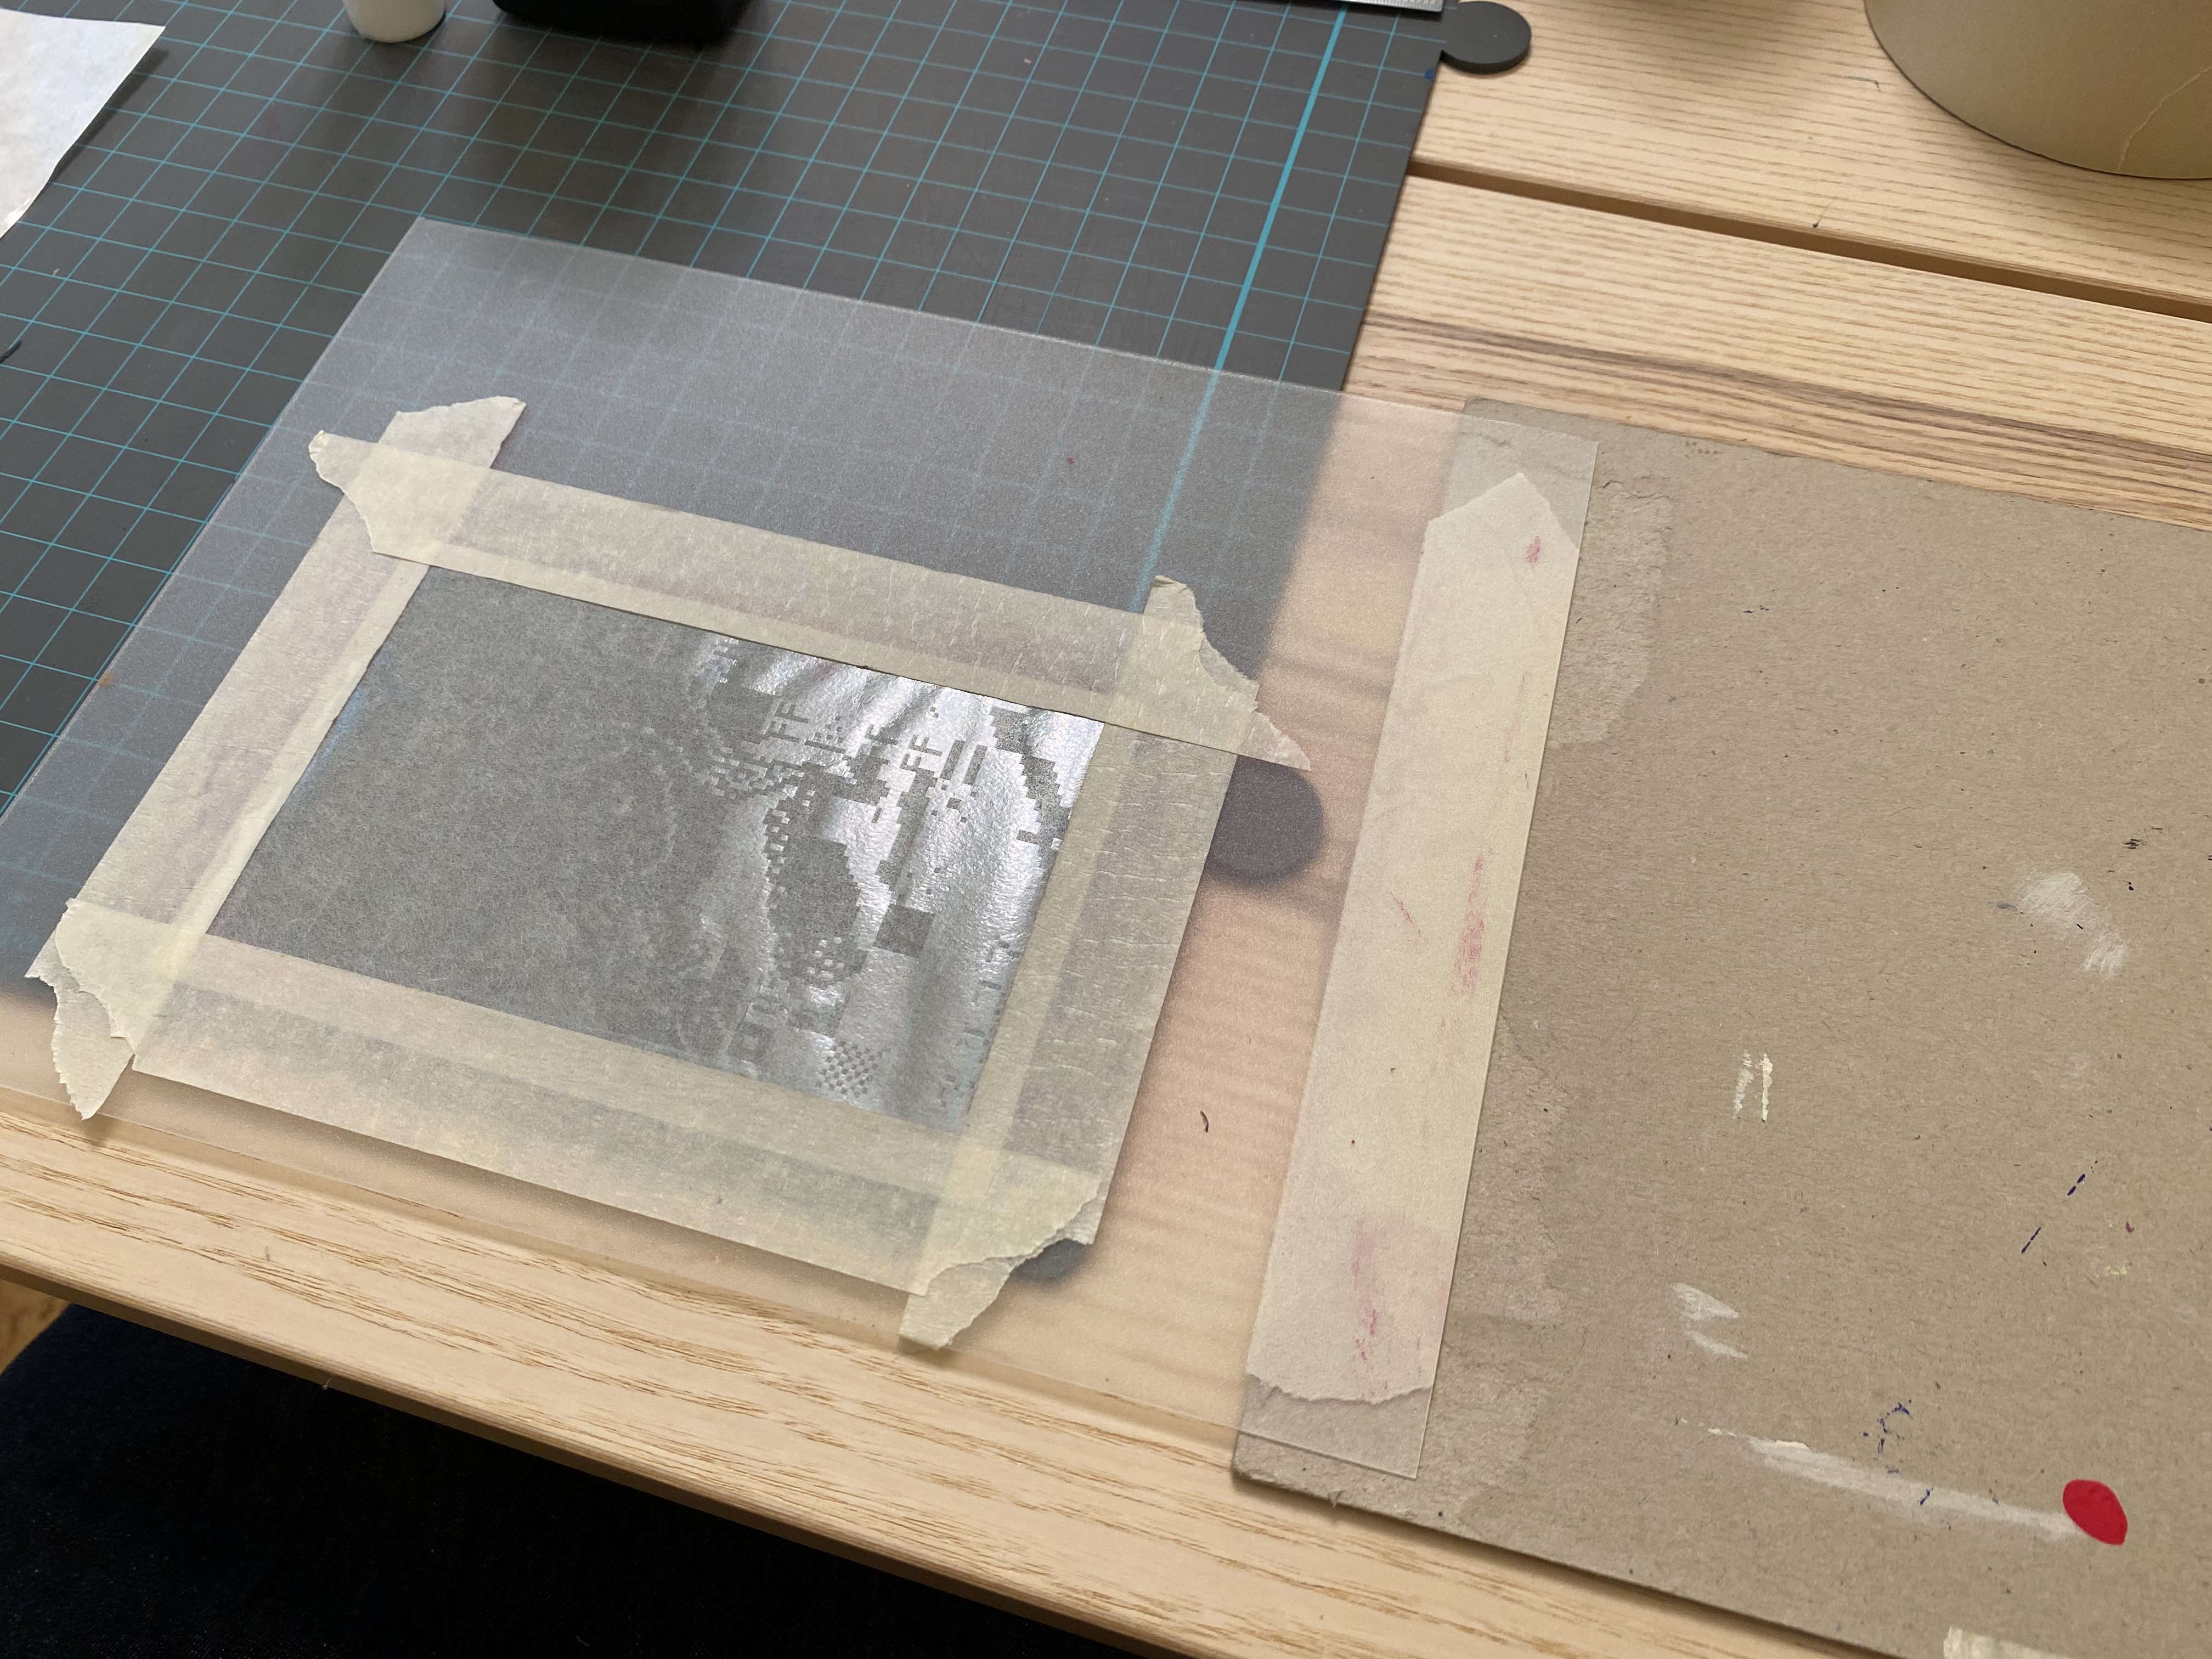
Instead, I cut a 3.8" x 5.8" rectangle from a sheet of rigid, clear polypropylene to create a frame. I taped the top edge of the frame to a piece of chipboard from the back of a paper pad to create a hinge. Finally, I taped the stencil into the hole of the frame from its underside, shiny side down. This creates something not unlike a screenprinting setup.
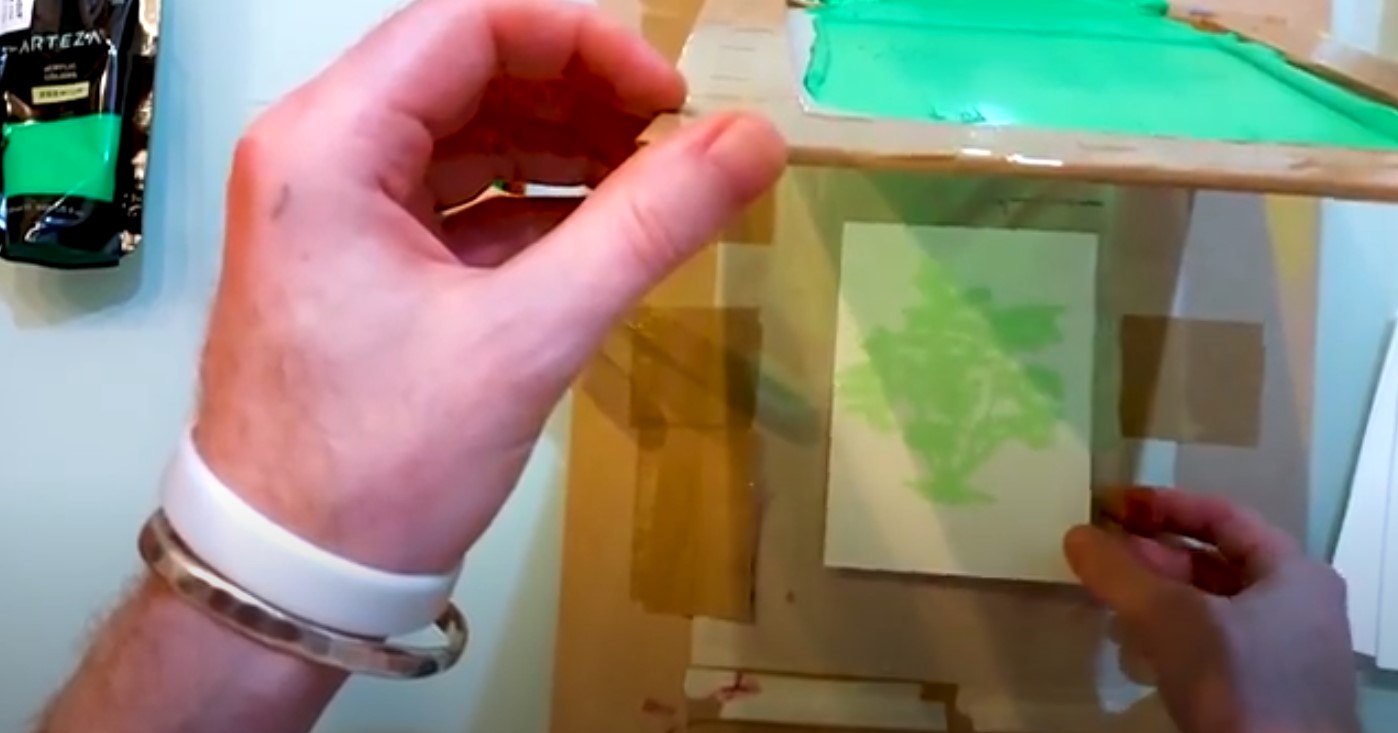
When using a frame like this, ink is brushed or rolled on the back of the stencil, one print at a time. The benefits of this are over a press method are:
- Less ink waste
- Ability to see if all portions of the image have been inked and, if not, to reink them
- More consistent application of ink
The clear polypropylene sheet was purchased at a local Daiso for about a dollar. It can be cleaned and reused over and over, it does not require the use of ink-blocking tape as cardboard would, and it is easily cut with a blade. Furthermore, by virtue of being clear, it can make registration and stencil alignment easier. (Another thing you might find helpful is drawing gridlines every 1/2" on the chipboard to help with alignment.) Finally, the polypropylene sheet is rigid but has just enough give to allow you to bend the frame backwards slightly as you separate it from the paper. I find this really helpful in preventing smudges during lifting.
The trickiest part of preparing the frame is taping on the stencil. I strongly recommend using wide, low-tack drafting tape sold in art supply stores. This is a paper tape that you can reposition in case there are wrinkles in the stencil. I tend to tape down one side, then gently tug the stencil as I tape the opposite side, and reposition here and there as needed. The goal is to have a taut, wrinkle-free stencil perfectly aligned inside the frame's cutout. Remember to tape the stencil to the underside of the frame; otherwise, the edges of the image may be cut off.
I tried numerous ink application techniques and found the best results using brushes with short, synthetic, dense, and equally-long bristles. A decoupage brush I had in my studio (pictured below) worked perfectly. Inexpensive foam rollers can be used, too. When the right amount of pressure is applied (and assuming you have not overinked your stencil), you will see the image appear as you brush or roll. This happens as ink is pushed through the stencil and repelled from the non-printing areas.
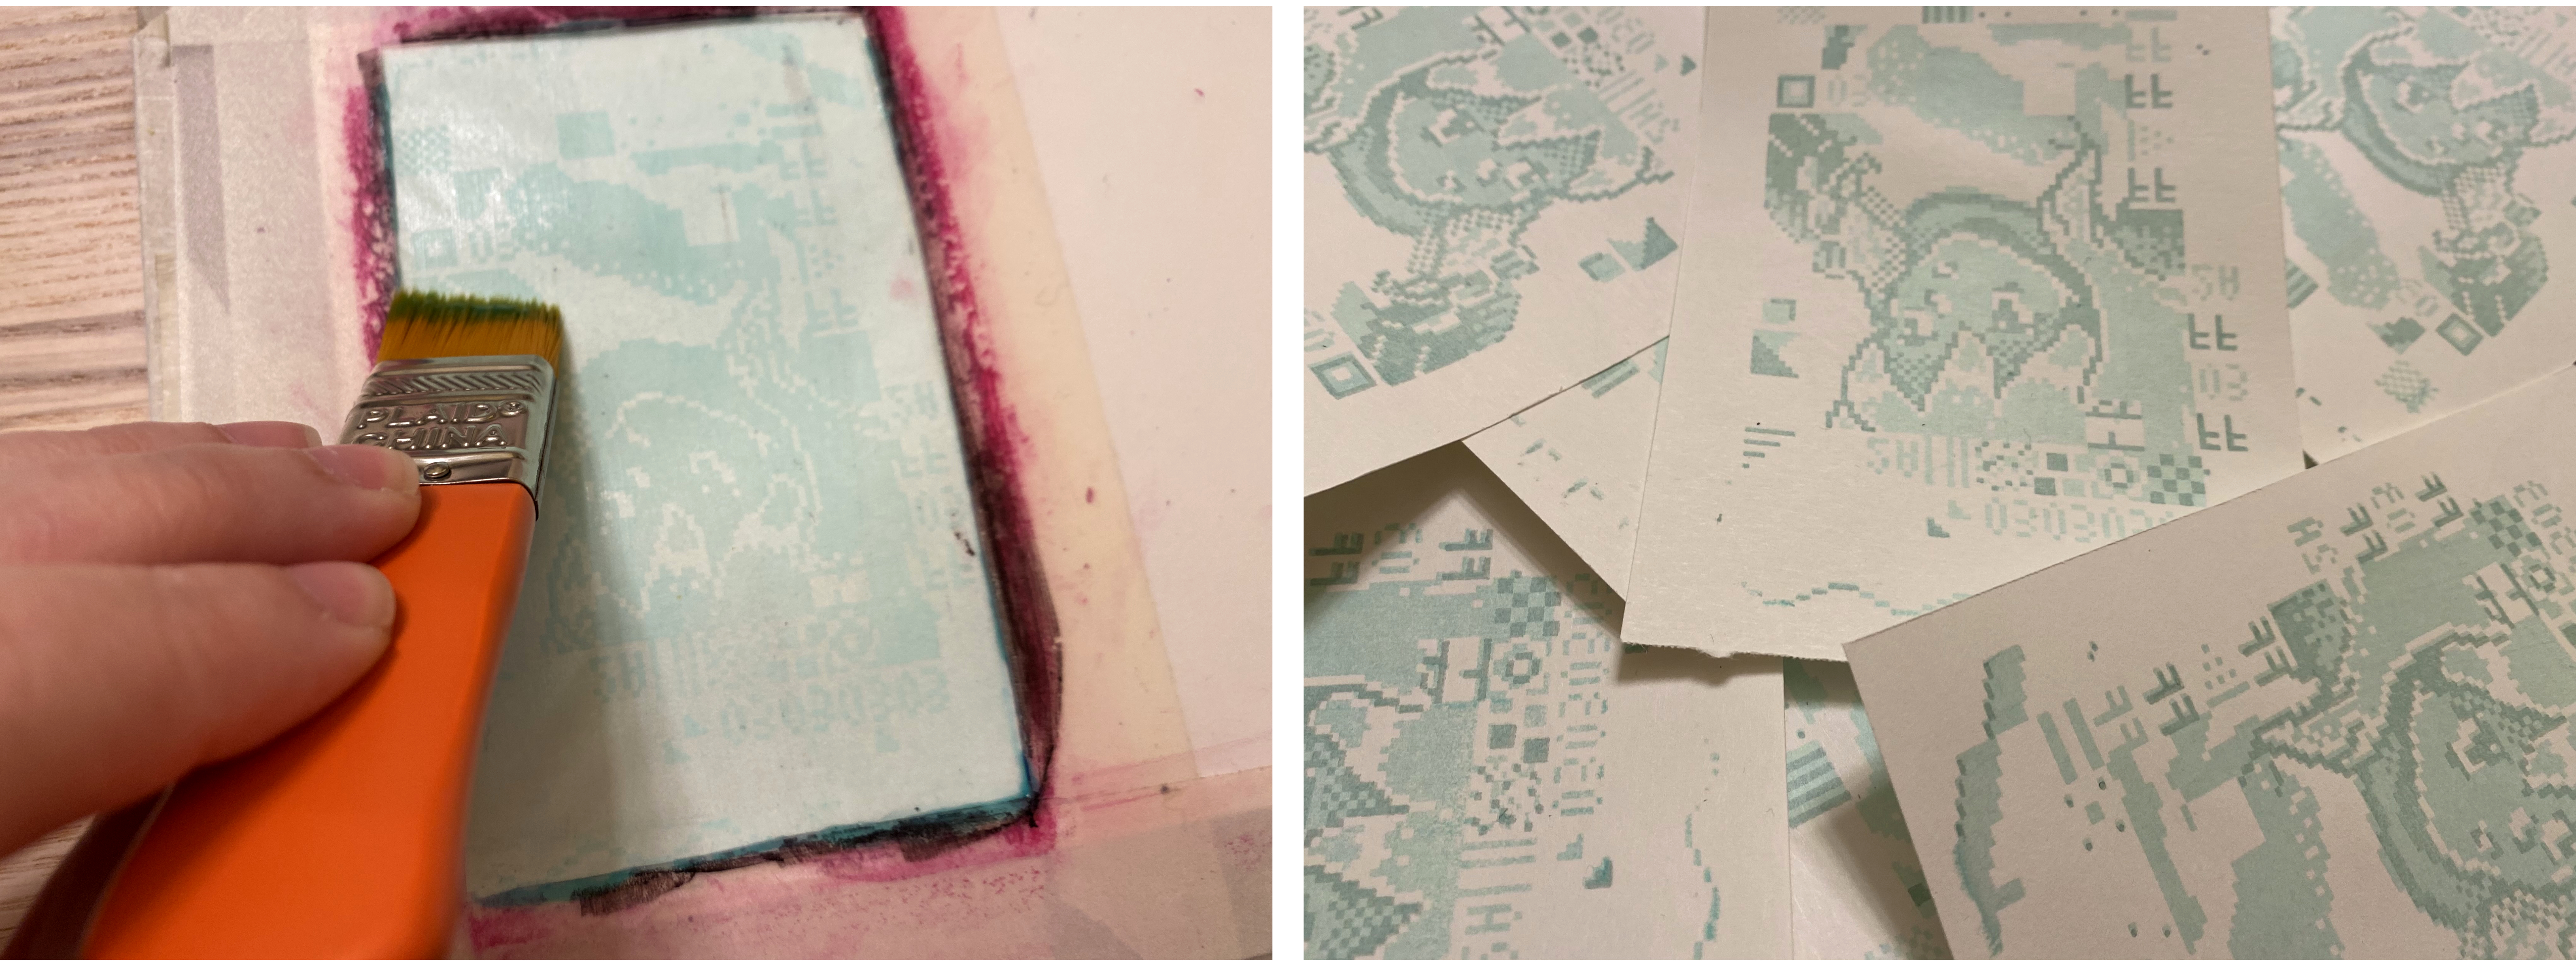
Note that applying too much brush or roller pressure can tear the stencil. Once torn, it can no longer be used.
Choosing and preparing inks
The most time spent during my experiments, by far, was with inks or paints (I'm using these terms interchangeably). I wanted inks that met the following criteria:
- Lightfast
- Consistent in pigmentation
- Resistant to spreading on paper
- Free of VOCs and toxic pigments such as cadmium
- Blendable for adding transparency or making custom colors
- Slow-drying (to keep the stencil workable and crisp)
- Reasonably affordable
- Easy clean-up
I experimented with oil- and water-based paints, including screenprinting ink, block printing ink, gouache, watercolor, intaglio ink, acrylic paint, oil paint, alcohol ink, and calligraphy ink. Straight out of the tube, the best results were with water-based screenprinting ink and Golden Open Acrylic, a slow-drying acrylic paint designed to have a long open time like oil paint. However, both inks have a tendency to get a little goopy.
During my tests, the main contributors to poor print quality were bleeding, smudging, fading, wrinkling, and master degradation, caused by the following ink qualities:
- Bleeding: Ink is too thin
- Smudging: Ink is too thick or too slow-drying (e.g., oil paint)
- Fading: Ink is too fast-drying, causing it to dry into the master (e.g., gouache, acrylic paint)
- Wrinkling: Ink is too wet, causing the master to sag and pool with ink
- Degradation: Ink is too dry, causing friction against the master and spotty printing
Eventually, I found the silver-bullet ingredient that helped with all these issues: nori, or rice-flour paste. I learned about this from Stampalofi, and adding it to my inks dramatically improved my results. (This also extended the inks significantly, making printing more economical, too!)
Upon further research, I learned that nori has been used for hundreds of years in paper-stencil crafts such as katazome fabric printing as an adhesive, ink additive, and resist paste due to its ability to create a stiff film without wrinkling or soaking delicate paper.
Did you ever make "ooblek," a mixture of water and cornstarch, in chemistry class? Ooblek is a non-Newtonian fluid that stiffens under nominal pressure, making it fun to squish in your hands. Screenprinting inks have an ooblek-like additive to improve their performance when pressed by squeegee. Nori lends this same benefit, imparting an ineffible "more wet yet more dry" quality that other paints lack.
To make nori, add 10 grams of rice flour to 2 ounces of water and stir. Add that to another 2 oz. of water simmering on the stovetop. Stir constantly with a silicone spatula until it's thickened a bit. Scraping the spatula along the bottom of the pot should cause the mixture to fill back in just a bit more slowly than a liquid would. Pour the nori into a bowl, leave it to cool, and use within 24 hours. Once cool, it should have a pudding-like consistency. This will need to be thinned later, but it's better to start with a thicker paste and thin it in small portions as you use it.
Pre-made nori can be purchased at art supply shops, and while it has the benefit of added preservatives, I got better results with the homemade variety, which is of course more affordable as well.
Getting the right proportion of nori, ink, and water is a little bit of a dark art, but I'll do my best to describe my approach: For a brush-on technique, the ideal paint consistency is that of a brush-on marinade or thin sauce. It's thinner than ketchup and liquid enough to glide with a silky feel when spread by a paintbrush. When collected on a paintbrush, the ink should not drip from the bristles but should just barely hang on.
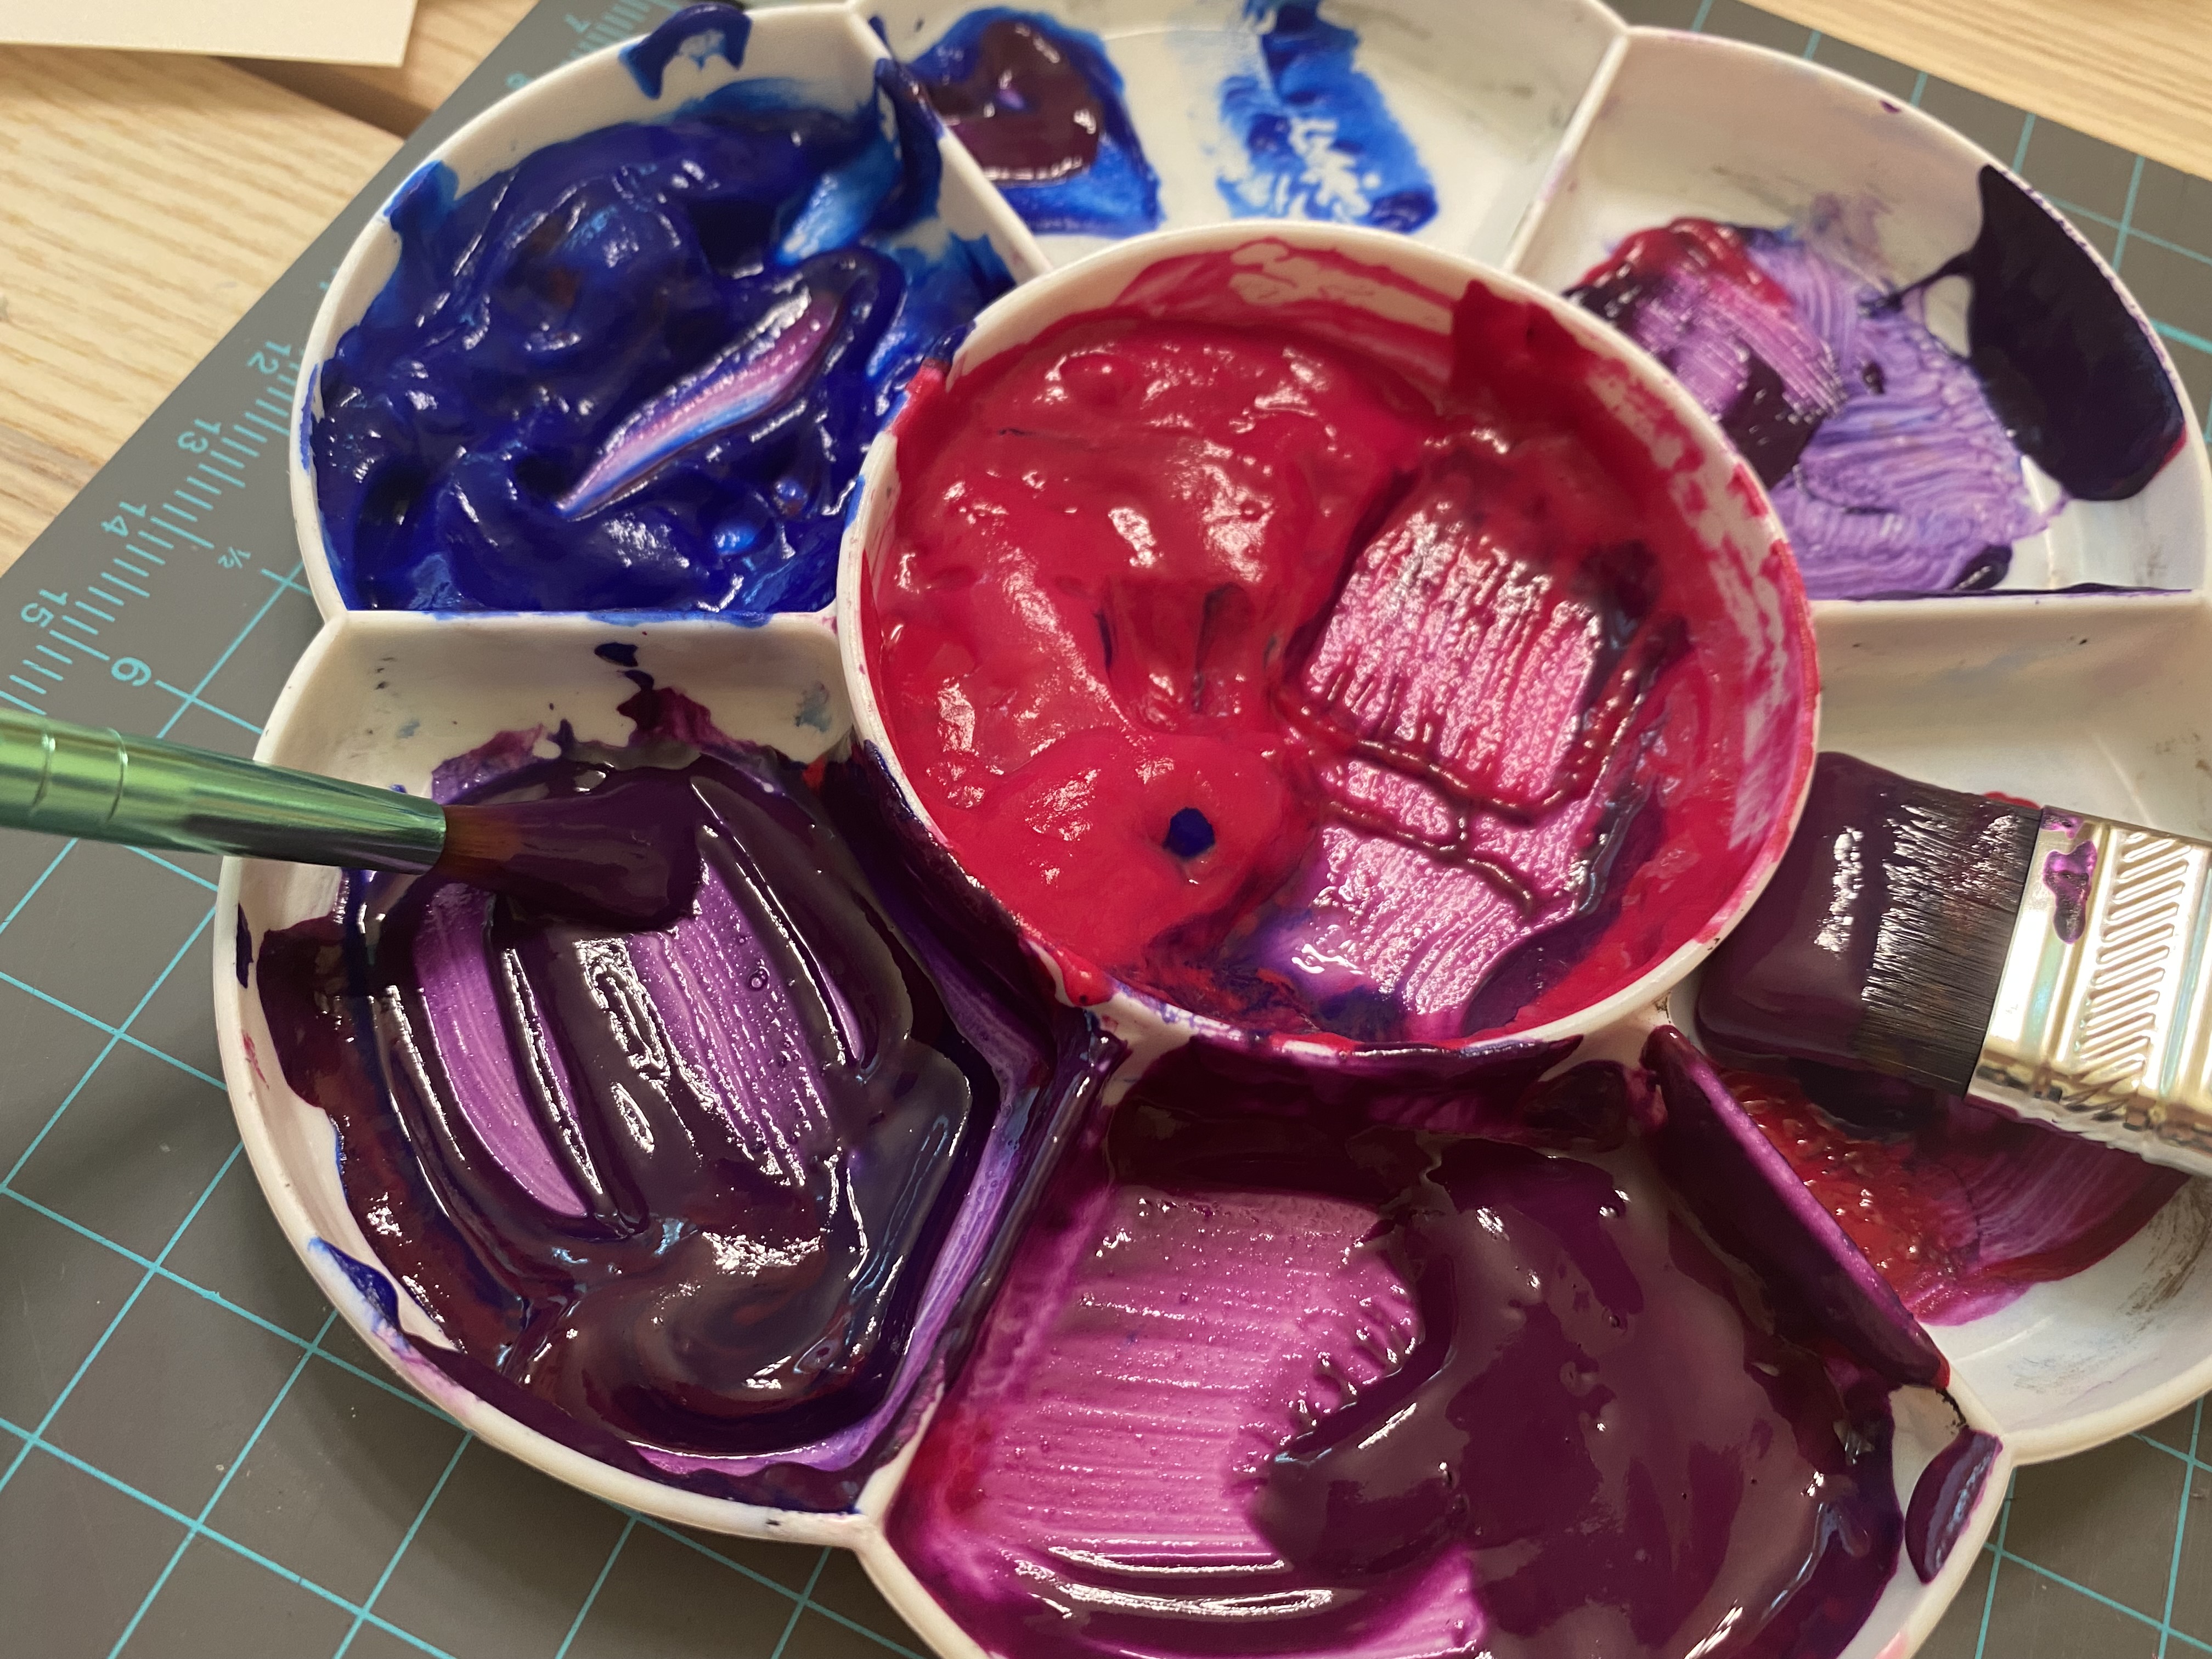
My best results have been acheived by mixing thinned nori with either Golden Open Acrylic, calligraphy ink, or a mix of the two. Calligraphy ink is more economical since little is needed, and it is offered in fully non-toxic organic-pigment ranges such as Dr. Ph. Martin's Bombay Ink. Student-grade bottled sumi ink is both affordable and an excellent additive for darkening colors. Golden Open Acrylic is more of a specialty paint, and care should be taken to choose colors that don't include heavy-metal pigments. However, it offers rich color and has a long working time, meaning there's little risk of ink drying in the stencil. Retarder additives used in screenprinting may be useful for this application, but I have not tried those yet.
Paper selection
In my experience, the best papers for printing are smooth-textured and resistant to warping when wet. I found that something toothy like a watercolor paper won't pick up as much detail, while cheaper mixed media papers can warp. I've had good results with newsprint and marker paper like the one made by Copic. OGAMI paper, made from reclaimed quarry waste, gives a unique smooth and matte finish that is both hard to describe (and hard to photograph, unfortunately). But the results are quite unique.
That's it for now!
Despite the lengthy detail posted here, the process really is quite quick, simple, and economical. I can typically go from idea to a set of prints to clean-up in 1 to 2 hours, and that's at a leisurely pace. When printing is complete, the stencil can be easily pulled off its frame and discarded. It's been quite fun, and I definitely plan on making more mimeoprints in the future.
Thank you for reading through to the end, and I hope this has been helpful or educational to other printmaking enthusiasts. Happy mimeoprinting!
